
User Interface: DISPLAY and INPUT commands
DISPLAY and INPUT are two useful "User Interface" command sets available to the KSE user. Display enables you to create a simple panel for displaying information, whereas INPUT enables you to create an interactive form for display / input / edit of parameter values which may or may not correspond with a dataset record (e.g. a Customer details record). Both methods can include images to be displayed.
Both these facilities are useful if, say, you wanted to 'front-end' an Excel speadsheet with a user friendly method of maintaining the data. In effect, KBL can be used to treat simple files either in .xlsx or .keg format as a compact database application.
DISPLAY
Here is a typical Display form:
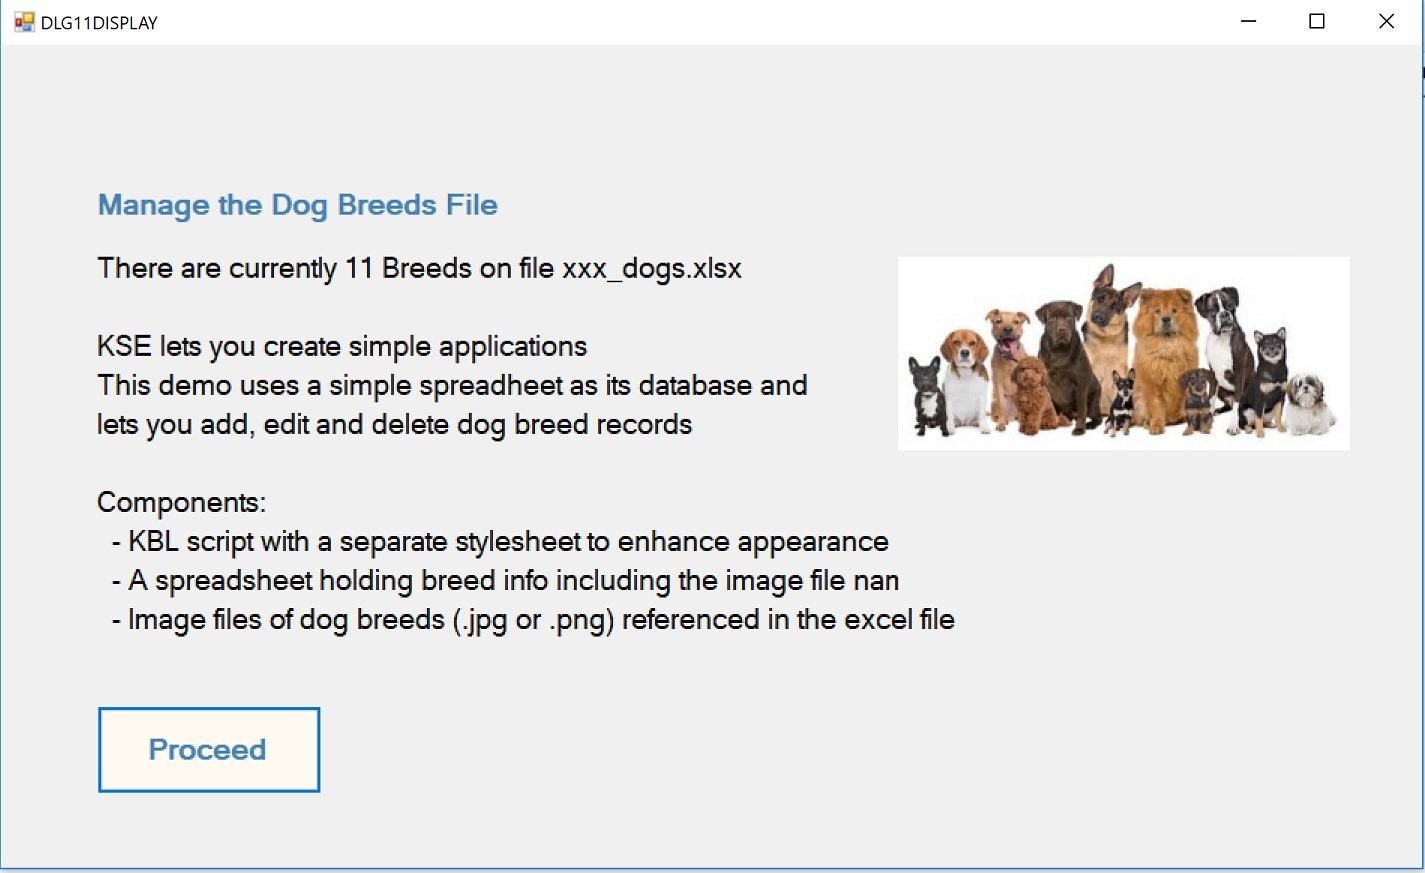
The script needed to display this comprises:
DISPLAY /NEW // Initiate new display
DISPLAY /TITLE "Manage the Dog Breeds File"
DISPLAY /LINE "There are currently [NUM_BREEDS] Breeds on file [BREEDS_FILE].xlsx"
DISPLAY /LINE ""
DISPLAY /LINE "KSE lets you create simple applications"
DISPLAY /LINE "This demo uses a simple spreadsheet as its database and"
DISPLAY /LINE "lets you add, edit and delete dog breed records"
DISPLAY /LINE ""
DISPLAY /LINE "Components:
DISPLAY /LINE " - KBL script with a separate stylesheet to enhance appearance"
DISPLAY /LINE " - A spreadsheet holding breed info including the image file names"
DISPLAY /LINE " - Image files of dog breeds (.jpg or .png) referenced in the excel file"
DISPLAY /PICTURE pics:dogs.jpg
DISPLAY /Show Proceed // replace OK button with Proceed
The DISPLAY command has a simple construction with just five elements:
Display /New - Start a new display specification
Display /Title - Add a Title which can be text or text with embedded parameters
Display /Line - Add as many text lines as you need, again parameter values can be embedded in lines
Display /Picture - Include an image (a .jpg or .png which are located in the /PIC folder)
Display /Show - Display the form, you can add a button name (that replaces the default OK).
Note the use of parameters embedded in the text strings, this enables you to make your text variable, i.e. not hard-coded for example if you wanted to use the Display within a LOOP where you wanted the Title / Lines / Photo to be different on each loop.
INPUT
This command set is much more extensive and is used to create more sophisticated functions where data are to be inputted and edited as well as displayed. First, here is a simple example:
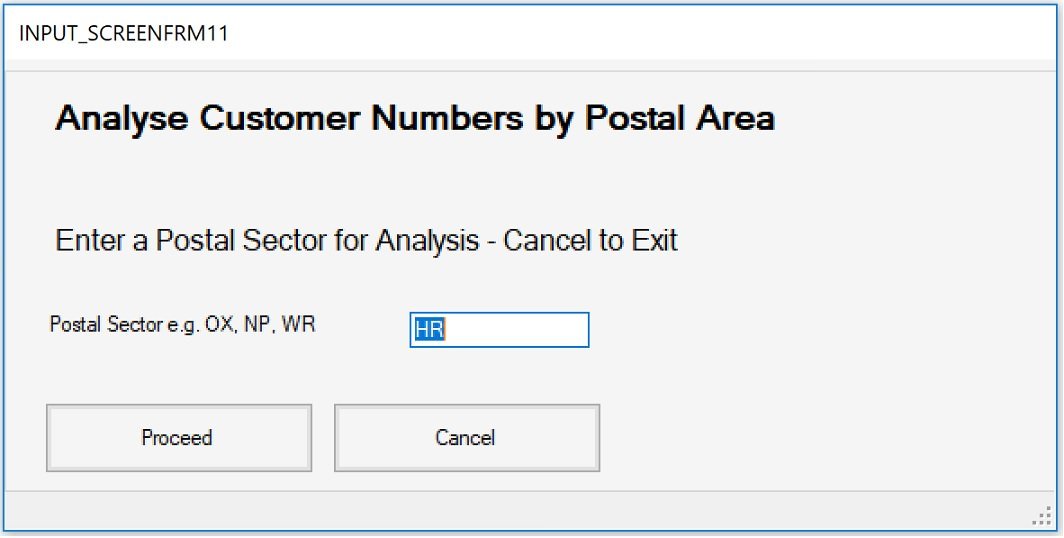
This was produced with the following piece of script
INPUT.CLEAR
INPUT.DEF /TITLE "Analyse Customer Numbers by Postal Area" default 40
INPUT.DEF /SUBTITLE "Enter a Postal Sector for Analysis - Cancel to Exit"
INPUT.DEF /FIELD POSTALSECTOR TEXTBOX "Postal Sector e.g. OX, NP, WR" 100 default HR
INPUT.CANVAS /CANVAS_WIDTH 600
INPUT.CANVAS /CANVAS_HEIGHT 300
INPUT.CANVAS /OK_BUTTON_TEXT "Proceed" // rename OK button
INPUT.CANVAS /SYSTEM_BUTTONS DONT_SHOW DONT_SHOW DONT_SHOW
INPUT.SHOW /CLEAR
INPUT.GET /PARS
The contents of the form are defined by the INPUT commands
The /TITLE and /SUBTITLE commands require a text heading followed by the width and height which may be set or left as default. Experience using them will tell you if you need to override these defaults.
/FIELD: These are the data items (in the boxes) that you want to display on a form, they have a field name (that mirror parameters of the same name), a field type, a brief label that describes the field, field width and height and what the default value is (or Blank). Lastly, there is an optional parameter which indicates the style definition to use (if a stylesheet is used).
Field types: There are several types of field which you can specify:
TEXTBOX - input/display box that can contain text, a number any alphanumerical text.
COMBOBOX - this is for an alphanumeric value from a prescribed list of permitted values is required. The user must pick one from a drop-down list and the combobox definition is followed by allowable options specified by /ADDITEM lines.
CHECKBOX - this is where you want to obtain simple yes / no, on / off answer in a field, in the second example a field asks is the breed suitable for children Yes or No? if the box is ticked, the value of the field returned will be a Y or N.
INPUT.CANVAS
These commands control some aspects of the appearance of the form, for example CAPTION labels/names the box the form sits in, /CANVAS_WIDTH and _HEIGHT sets the initial size of the form and /OK_BUTTON_TEXT and /CANCEL_BUTTON_TEXT allow you to override the default button names.
The /SYSTEM_BUTTONS enable you to remove the standard -, o and X controls so you can better control the outcome of the INPUT form.
Another Example of INPUT
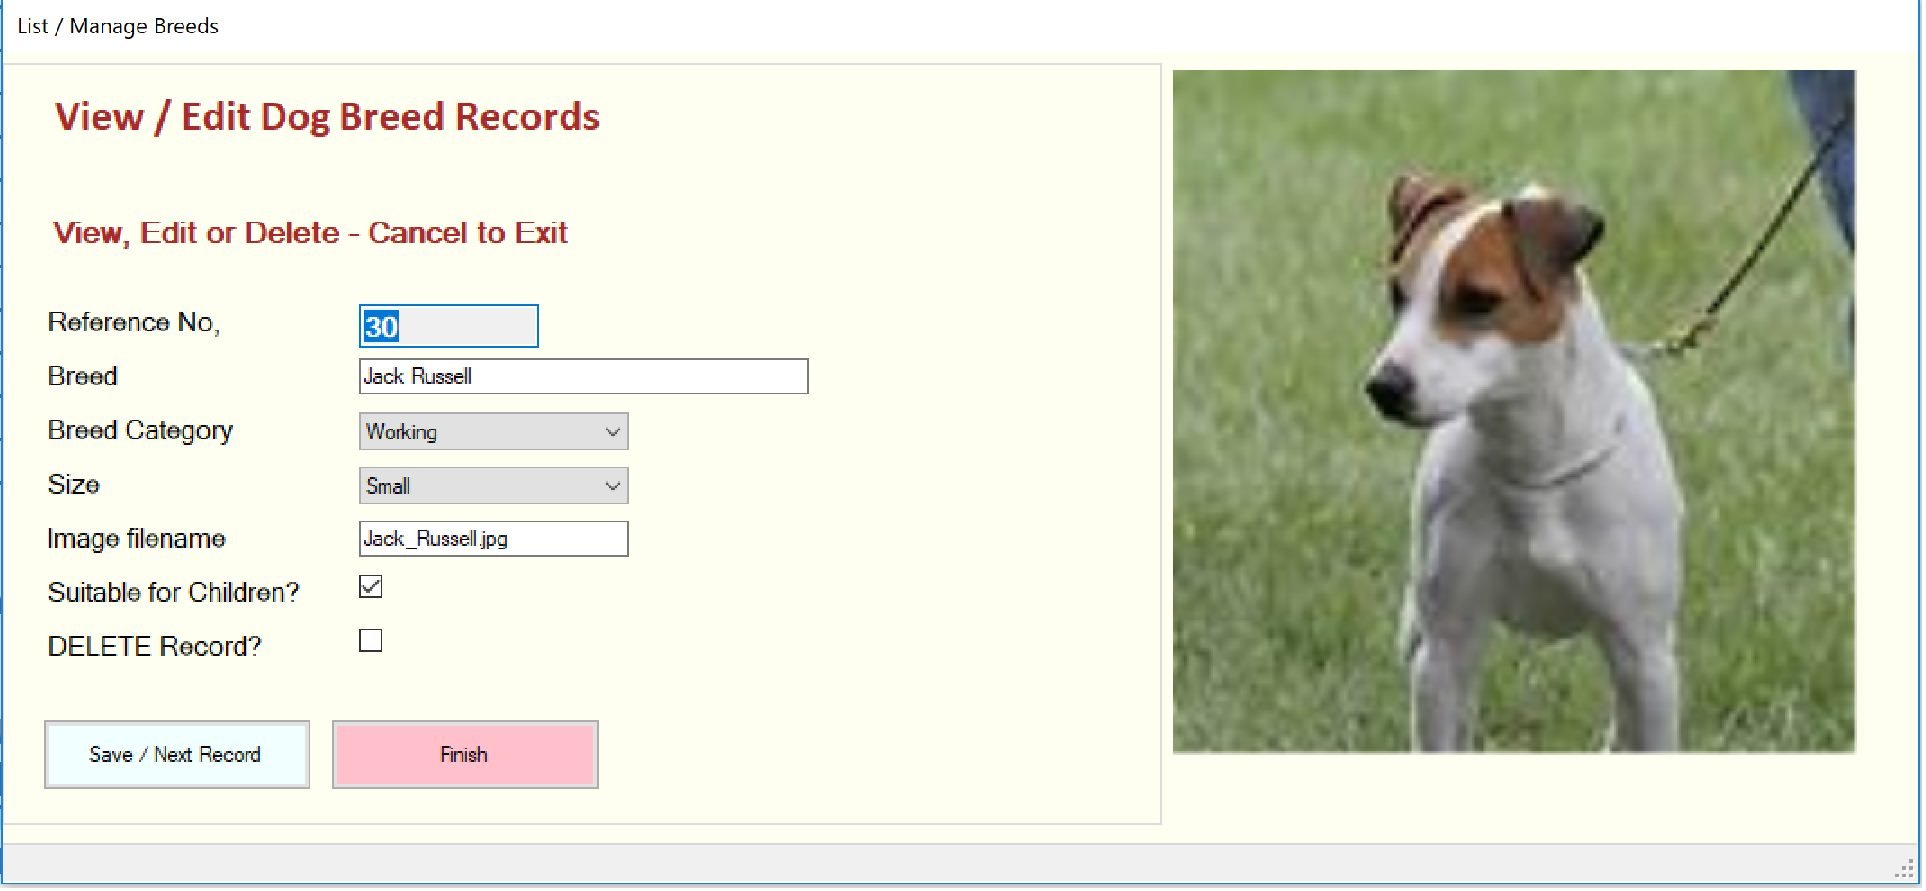
The script components used to produce this form are:
// Define an Input form
INPUT.CLEAR
INPUT.STYLE x.SHEET_02 // tell input if you want to use a stylesheet (optional)
INPUT.DEF /TITLE "View / Edit Dog Breed Records" default 40
INPUT.DEF /SUBTITLE "View, Edit or Delete - Cancel to Exit"
INPUT.DEF /FIELD DOG_REF TEXTBOX "Reference No, " 100 default blank B3
INPUT.DEF /FIELD Dog_Breed TEXTBOX "Breed " 250 default blank M1
INPUT.DEF /FIELD DOG_CATEGORY COMBOBOX "Breed Category " 150 default
INPUT.DEF /ADDITEM Toy
INPUT.DEF /ADDITEM Working
INPUT.DEF /ADDITEM Wild
INPUT.DEF /ADDITEM Companion
INPUT.DEF /FIELD Dog_Size COMBOBOX "Size " 150 default blank
INPUT.DEF /ADDITEM Small
INPUT.DEF /ADDITEM Medium
INPUT.DEF /ADDITEM Large
INPUT.DEF /ADDITEM "Very Large"
INPUT.DEF /FIELD Dog_Image TEXTBOX "Image filename " 150 default
INPUT.DEF /FIELD Dog_child_suitability CHECKBOX "Suitable for Children?" 20 default blank
INPUT.DEF /FIELD Delete_rec CHECKBOX "DELETE Record?" 20 default
INPUT.CANVAS /CAPTION_TEXT "List / Manage Breeds"
INPUT.CANVAS /CANVAS_WIDTH 1080
INPUT.CANVAS /CANVAS_HEIGHT 500
INPUT.CANVAS /OK_BUTTON_TEXT "Save / Next Record" // rename OK button
INPUT.CANVAS /CANCEL_BUTTON_TEXT "Finish" // rename CANCEL button to FINISH
INPUT.CANVAS /SYSTEM_BUTTONS DONT_SHOW DONT_SHOW DONT_SHOW
The following script demonstrates how, following the INPUT form definition above, can be used to move records loaded into MAIN into the form, be edited and returned back into MAIN (prior to being exported back to a file. Note Get and Put commands move values between parameters, fields and columns that have the same name.
// Loop through the dataset to display all the dogs unless stopped by the Finish Button
LOOP L1 TAB MAIN // Visit each row ( record) in MAIN
// Now to take values in the specified row of MAIN [L1] and put them into parameters of
// of the same names as the column names
TAB.PUT /TO_PARS [L1] // Create parameters from the current row in MAIN
// Note one of the parameters will be DOG_IMAGE with the .jpg or .png filename
// the image name changes from record to record
INPUT.PICTURE pics:[DOG_IMAGE] zoom 380 380 650 10
INPUT.PUT /PARS // Transfer values in parameters to the INPUT fields of the same names
INPUT.SHOW /NO_CLEAR // Display the INPUT form with field values populated
// After showing the form, the user can pass over or edit the data in the INPUT form.
// Then we check to see which button was clicked.
IF IS [INPUT_CLICKED] != "OK"
// If the OK button is not clicked, we break out of the look
LOOP BREAK
IF END
// The user may have changed one or more of the field values on the input form
INPUT.GET /PARS // Get the values from the INPUT fields back into parameters
IF IS [DELETE_REC] = Y
// If the Delete Rec checkbox has been ticked, we will delete the record
DELETE /ROW NO [L1] // Delete row [L1]
MSG "[DOG_BREED] Deleted"
IF ELSE
// Otherwise we update the row L1 with any changes made to fields
TAB.GET /FROM_PARS [L1] //get the param values into current row
IF END
LOOP END // Loop round until break out or all rows visited
The first thing to notice in this example is that it is presented form is not default grey but in colour. This is because the INPUT form can have its characteristics changed by Style commands here from a Stylesheet file. Stylesheets are an important part of application building more appropriate to KSP. We will cover Style commands separately.
The contents of the form are again defined by the INPUT.DEF commands although more extensive than in the first example. The images displayed are specified in column in the dog breed record and parameterised in the INPUT.PICTURE command line. Note that images are kept in the Studio /PIC folder. The best way to get to grips with using the DISPLAY and INPUT commands is to look at and copy components from the examples.